
Pre-orders are quite common in many business niches. The music industry, for one. Or the gaming industry. Custom clothing, baked goods, custom furniture, just to name a few. Since you’ve landed on this article, your business probably entails pre-orders too. If you are looking for a fast and easy way to implement them (without necessarily having a website), you have come to the right place. In this article, you’ll learn how to create a pre-order form like the one below without any technical knowledge.
To do that, you can use the template above or choose another one of Getform’s templates from the gallery. Getform is a zero-code online form builder that allows you to build custom forms and share them via a link.
Keep in mind that the form you’re about to build won’t allow you to process payments from your customers directly. You can use it to collect pre-order information as well as the information you might need for the invoice, but you’ll have to arrange payment processing separately via PayPal, Venmo, Zelle, or any other solution that works for you. And now without further ado, let’s move on to creating your pre-order form.
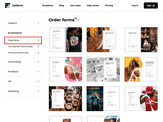
For starters, choose your base from Getform’s template gallery. For a fast setup, we recommend using the template above or one of the options in the order forms section of the gallery: Open the template you’ve picked, click the Take this template button, and follow the prompts to create a Getform account.
You can now start editing the template. In the Design tab, you’ll be able to edit the content and appearance of your form. Open the Pages section to navigate the existing form pages: 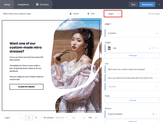 If necessary, click the + Add page button to add more pages to your template:
 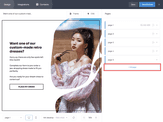 To change the text on the form, click any of the text elements in the preview and enter your copy in the text editor on the right.
 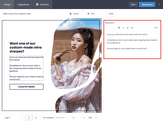 You can edit the text of the fields and buttons in the same way. If you want to add a field, go to the Fields section in the menu on the right, click + Add field and choose the necessary field type: As you can see, we’ve added a consent checkbox to the form. 💡It’s a necessary practice to ask respondents for consent to receive promotional material when you collect information like email addresses and phone numbers. If you’d like to remove one of the fields from the template, click on it and hit the Remove field button in the top-right corner of the screen.
 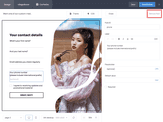 ❗ If you add more pages to accommodate new fields in your pre-order form, make sure to have a button performing a Submit/Go to page action on each page.
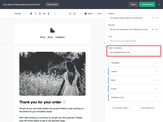
 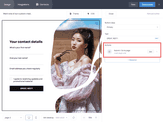 Don’t forget to check and edit the text of the so-called ‘Thank you’ page — the last page of the form. On this page, you should thank your customers for placing an order with you and inform them of what will happen next.
 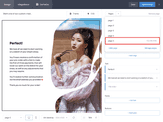 When the content of your form is complete, move on to the next phase.
It’s now time to align the style of your form with your branding. Go to the Theme section to change the font, color theme, and style of your form. 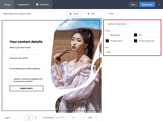 The platform offers several pre-made themes you can choose from:
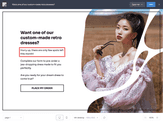
 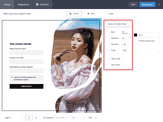 Next, swap the default image of the template with one of your product(s) or with one that represents your niche. To do that, click the current picture and hit the Change image button. Pick an image from the built-in gallery or upload one from your device.
 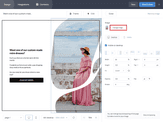 If needed, adjust the placement of the image using the controls in the right-side menu:
 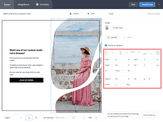 ❗ If your form has an image on multiple pages, make sure to change it for all of them. When you are happy with the content and design of your form, don’t forget to check its mobile version to make sure it’s user-friendly:
 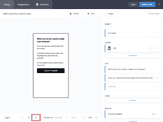 If you notice that the content on the mobile form looks too crowded, consider creating additional pages and placing some of the fields there, so that everything is readable on smaller screens as well. Lastly, if you want to better organize and manage your incoming orders, you can do so by using the Integrations tab. For example, you can connect your form with Google Sheets, your CRM software, or your preferred invoicing program.
 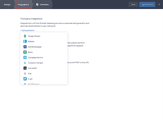 Once you are done setting up your form, hit the Save & close button and follow the prompts to activate it.
Next, you need to make sure that your customers get a confirmation of their order and all the information they may need from you at this stage. You can do that by setting up a Form submission automation. Сlick the Set up automation button on the form card and then hit +Create new : 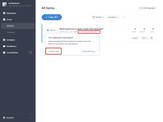 In the automation screen, click the +Add action button and select Send email . To save time and effort when crafting your email, you can choose one of the premade templates: Here’s an example of email you can create and send within your automation:
 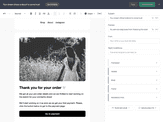 You can send the email immediately after your customers submit the pre-order form, or set up a time delay to send it later:
 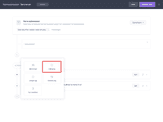 When you’re done working on your automation, hit Save & close .
You have now one last task: share the form you have prepared with your audience and be ready for the first pre-orders to come your way. In the Forms section of the Getform dashboard, click the Get link button and copy the link. You can now share this link with your audience via the usual channels you use to advertise your products, whether that is a website, email newsletter, or social media page. In case you don’t have a website and are in need of some tips, here are ideas for sharing your pre-order form on some of the most popular social media platforms 👇
If you have a store on Facebook, you have the following options:
If you have a following on TikTok, sharing your pre-order form there is a good idea.
TikTok only allows Business account owners to share links in the bio. If you have a regular account, don’t worry: turning your current account into a business one is only a matter of a few clicks. You can learn how to do that on TikTok’s support page, under the section “Switch to a business account”.
When that is done, you can share the link to your pre-order form in your TikTok bio.
We have some tips we’d like to share to help you increase your number of pre-orders. Check them out 👇
Give your potential customers an incentive to place an order with you. Examples of effective incentives include:
To give your undecided customers that extra nudge to purchase your products, you can incorporate scarcity and urgency tactics into your pre-order form.
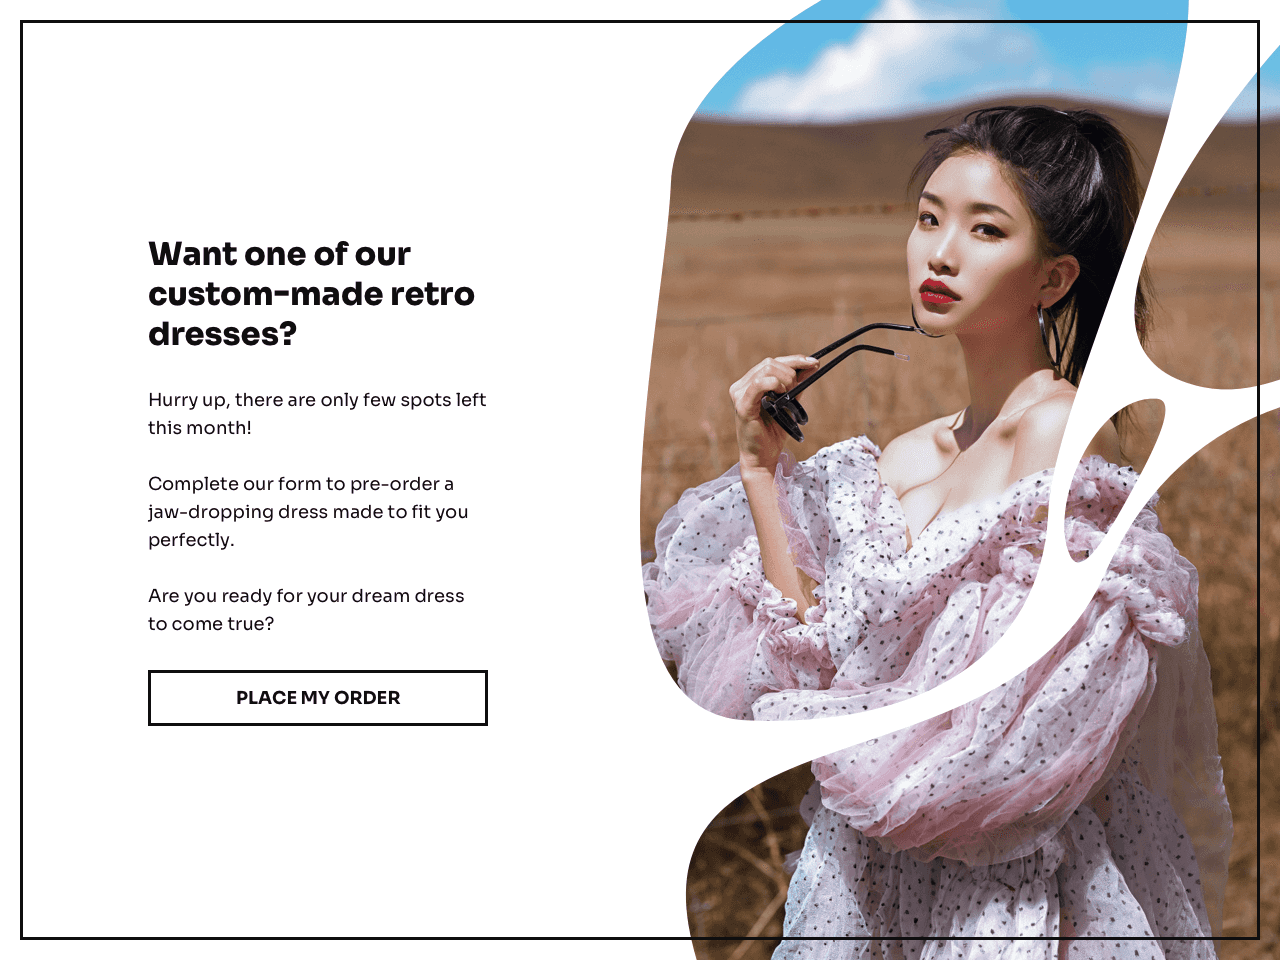
Scarcity tactics consist of letting your customers know that the product is available in limited quantity. Even custom-made products can be limited in quantity, as you may decide to accept only a certain number of orders during a given period of time. We used this tactic in our template above, take a look again:
This is, in fact, an effective combination of both scarcity and urgency. The latter consists of informing your customers that the deal won’t be available indefinitely, and if they want to take advantage of it, they need to act quickly.
Nowadays, people are used to getting what they want here and now. They don’t want to spend too much time filling out a form to get your product.
That’s why we recommend limiting your pre-order form fields to the minimum, so that filling it out won’t take up too much of your customers’ time.
Make sure all your questions are not only necessary, but also clear. You don’t want your customers to give up their pre-orders because they don’t understand what you want to know from them.
Pre-orders are a form of trust from your customers. Trust that your product is worth their money and the wait. So, don’t leave your customers hanging and not knowing what happens after they place a pre-order. Make sure to let them know in detail what the next steps are and what the waiting time is.
So, don’t leave your customers hanging and not knowing what happens after they place a pre-order. Make sure to let them know in detail what the next steps are and what the waiting time is in your follow-up message.
Also, don’t forget to give them an easy and fast way to contact you should they have any questions or concerns. You can do that by adding a reply-to address to your email settings:
If you have followed our guide step by step, your pre-order form should be ready and well in sight on your social media pages. It’s now time to prepare for when those orders will start rolling in!
Create a pre-order form for your products within minutes, easy and code-free. Subscription plans from $7/mo.